Friday, May 27, 2016

Canvas piece

Hi guys!
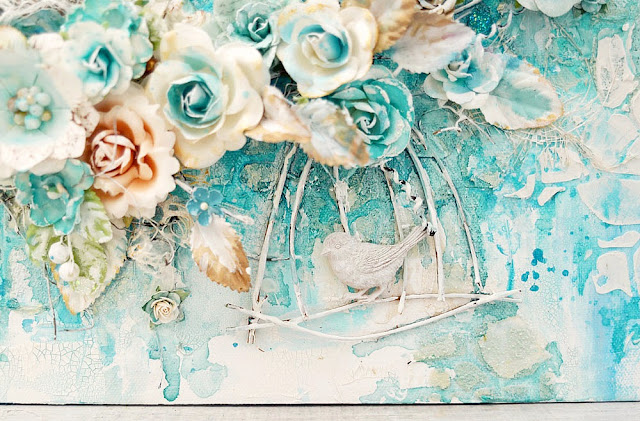
I just wanted to pop in with a commissioned canvas piece I have recently made.  It's so turquoise and gorgeous!  I love it......if it wasn't a request I would keep it for myself!!   We have the same taste in colours ;)

I have used pretty much all Prima products here, down to the stencil and texture paste. 

So so pretty!


Here are some detailed shots -


Thanks for visiting, have a wonderful weekend xx

Wednesday, May 25, 2016

PLS - Pinterest challenge


Hi there, I have a cute canvas to share today, which started as inspiration from this image......


   I am really loving Monochrome everything at the moment, I never used to put black on my other boys as babies, now Jagger’s cupboard is full of black and white!!  I wanted to make another little canvas piece for his room.  I am starting to get more and more tribal pieces for his room and thought a little Tee Pee on a canvas would be perfect.  I started with the background.  It is actually really collaged,  I just tore bits of paper and starting gluing them down.  I then added a some Gesso an Gel Medium to the background to fade the papers a little.  I then worked on the Tee Pee.  I cut feathers with a Die Cut from a few different papers and layered them together at the cross of the Tee Pee.  I used to arrows from the Alaska set and just added black mist to it then finished them off with some white spots.  These were then added and crossed over at the top of the Tee Pee.  The canvas was only meant to be black and white but with the mint in Jagger’s room, I just had to add a hint of that into the background too.


" Be Brave "


Pretty Little Studio Paper:

Wonderland – Sledding
Lets Go Travel – Amsterdam
Trick or Treat – Friday and Midnight


Pretty Little Studio Embellishments:

Lets Go travel – Alaska Arrows
Treasure Island – Sticker Treasure Words


Bye for now xx

Monday, May 16, 2016

Pretty Little Studio "Make A Wish"

Hi there :) 
 
I have a new Pretty Little Studio creation to share today!
 
Check out the Pretty Little Studio PAGE and their gorgeous new collection "Woodland" is now up for Pre-order.  It is beautiful!


Just a sweet little piccie of my first middle man and I on his 7th birthday ;)
 
 
"Make A Wish"


Paper -
Trick or Treat - Friday and Midnight
Lets Go - Venice
Silly Monkey - Silly Barry Black
Treasure Island - Pacific Ocean
 
Embellishments -
 
Wonderland - Flair Hot Cocoa
Stickers - Gold Treasure Flags
Let's Go - Die Cut Arrow Alaska
Let's Go - Flair Fresno
You and Me - Cutouts Adore You Phrase Strips
Treasure Island - Journaling Explore 3 x 4 stencil


Thanks for stopping by xx

Wednesday, May 11, 2016

Prima Foils and a quick how to........

Hi!  I just wanted to share my creation that went live on the Prima blog overnight :)


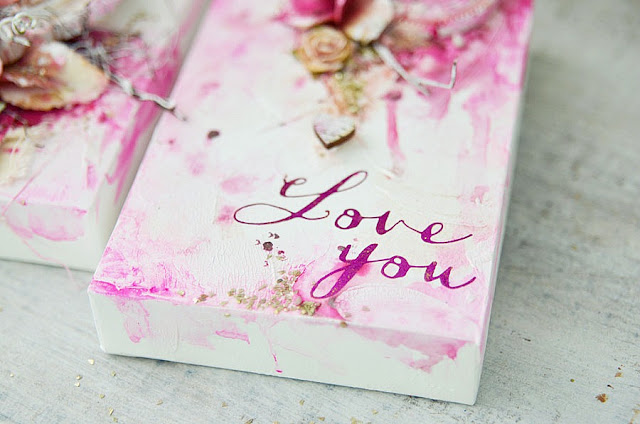
This year I decided to make this pretty set of Watercolor Panels (6 x 4" size), instead of a card, for my Mother this Mother's Day.  I just love the way these turned out.  I started out with the Adhesive Rub-Ons and added the Foil Sheet in "Something Berry" to the print.  For the second piece I didn't want it to be as busy as the first, and I wanted the words 'I Love You' to stand out.  Of course I had to use mine and Mums' favourite shades of pink.


Prima Products:
 #971328 Adhesive Rub-ons, #971335 Adhesive Rub-ons, #585648 Rub-on Foil Sheets -Something Berry, #585709 Watercolor Panel 4 x 6, #586744 Gold Kiss Boxed flowers, #586430 Royal Hall, #583774 Wood Variety, #963705 Art Stones, #961503 Texture Paste White Crackle, #961657 Glass Glitter Gold Rush, #584269 Watercolor Confections Tropicals, #580315 Color Bloom Empress Gold, #580278 Color Bloom Boysenberry


A few detailed shots for you - 


Lastly, I have a super quick tutorial on my second canvas.  I lost the light to take photos in the end but here is an idea on where to start :)
 
 
1.  I started off adhering the Adhesive Rubon 'Love You' to the bottom right hand corner of the 4 x 6 Watercolor Panel.  I then rubbed on the foil sheet from the Something Berry pack (the darkest shade of pink) to the words.


2.  With a piece of cardboard I scraped on some White Crackle Texture Paste to all areas of the panel except for the writing.  After a little drying time I added a little Pink Watercolor Confections to the edges of the panel. 


 3.  I added a small cluster of embellishments up the top starting with a resin piece (snapped in half).  I then added a little cheese cloth and then the flower.  Spraying the centre with Color Bloom spray Boysenberry. 


4.  I then added another small flower along with some Glass Glitter and Art Stones. I sprayed Color Bloom Empress Gold to the flower and spread it out with the watercolour pen (close by to the embellishments).   ...............(sorry, no more photos, but you can see end result above)..............I then added some florist vine, applied Gesso to the vine and flowers.  Lastly just adding a little more color to the pink areas and then adhered the Wood Variety heart to the centre of the panel with foam tape.


Thanks for stopping in!  And I hope you enjoyed my creations.
Hugs xoxo


Thursday, May 5, 2016

Prima projects

 
I have a couple of Prima posts to share with you today.........
 
The first one my photo gallery using the beautiful Salvage District Lanties!
 
SO very pretty they are :)


My bedroom (complete with sleeping bubba).  These Lanties let off just the right amount of light!


Next up I created a canvas for this months gorgeous Prima Product Pick (PPP). 

 I just fell in love with this month's Prima Product Pick the minute I saw it!!  The colours are so fun, fresh, and bright, right up my alley.  I created a canvas piece on a Prima Watercolor Panel.  I just love the way all of the mixed-media products worked on this panel.   I started out with the idea of a birdcage (bottom right-hand side) and then the project progressed from there and, of course, I had to layer loads of beautiful Prima flowers.


Thanks for visiting xoxo